")


Maybe it’s just me, but I quite enjoy making up lengths of speaker cable. It can be an almost cathartic process to perfectly terminate and dress speaker cable – and working in the hi-fi industry, it’s something I take real pride in.
I’ve worked with a fair share of cables – from the simple, affordable staples right through to the kind of concerningly expensive options that make you think, “There’s a reason they charge for termination on these.”
The important thing to remember is that whether it’s £2 per metre or £30+, the process and principle are the same. So follow along below to learn how to wire speakers.
In a hurry?
If you don’t want to read the full thing, he’s a quick run-down:
- Measure – Determine the distance between your amp and speakers, factoring in routes along the floor, across surfaces, and up to the speaker terminals. Measure again to be sure.
- Cut – Trim the cable to length, ensuring you have two equal lengths.
- Split and strip – Remove the outer jacket to reveal the inner cores, or split the shotgun cable in half. Strip the last centimetre to expose the copper.
- Twist – Neatly twist the copper strands to keep them tidy.
- Add plugs and assign polarity – Attach connectors if needed, ensuring correct polarity.
- Plug it all in – Connect your cables and enjoy your setup.
Setting up
Select the right wire gauge
Cable gauge is a bit of an odd one. You might believe that a thicker cable must be better – and, in theory, it is. But it’s worth remembering that electrical current doesn’t travel inside the cable core – it travels along the surface. So a thicker cable means more surface area, more signal transfer, and potentially better performance.
From a physics perspective, different gauges – 12, 14, 16 AWG – offer different resistance levels. Thicker cables have less resistance and are generally better for longer cable runs. But for 99% of setups, you don’t need to worry too much about it.
I’d pay more attention to the cable’s composition – for instance, long grain copper vs. short grain copper – as that will often make more difference in a home hi-fi setup than gauge alone.
Measure how much you need
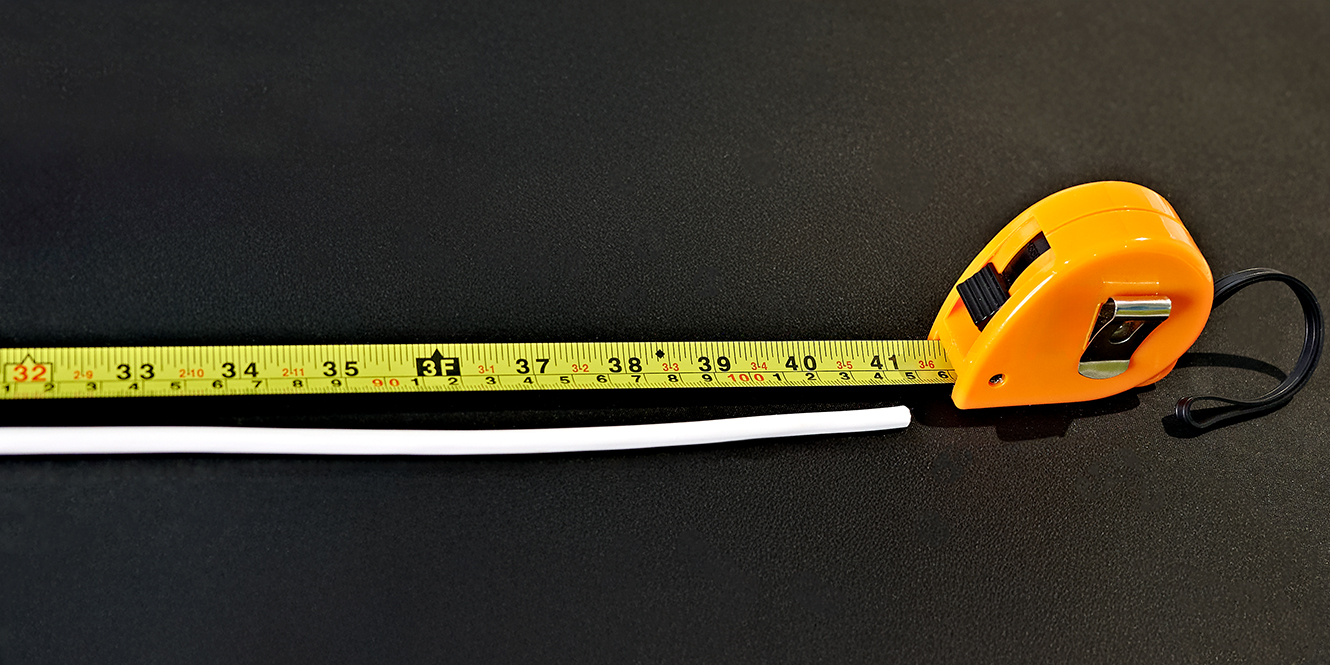
As the son of a hobbyist joiner and an ex-tool-maker/engineer, the adage “measure twice, cut once” is firmly ingrained in me. One of the most common issues I see with speaker cabling is people not measuring properly. They forget that cable has to go down to the floor, across the room, and back up to the speaker – so that 1m estimate quickly becomes 2m.
Measure carefully before you order, and consider adding a little extra for flexibility or repositioning later on. Also, you’ll want your cable lengths to be identical. Even if one speaker is closer, stick to equal runs – whatever the longest length is, cut two of those. It’s the purist approach and helps ensure balanced sound across both channels.
How to wire speakers
For context, I’ll be using the Fisual Easy Fix cable pack as a point of reference – but the principles here apply to any speaker cable.
Here’s what you’ll want to have to hand:
- Measuring tape or ruler
- Cable snippers (kitchen scissors won’t cut it – literally)
- A sharp knife (Stanley knives or box cutters work well)
- Wire strippers
- A pen
- A small screwdriver (if you’re adding plugs)
- Heat shrink (if you’re getting fancy)
1. Cut the cables
Assuming you’ve measured and ordered the right length of speaker cable, the first thing you’ll notice is that unless you ordered two separate runs, your 2.5m x 2 lengths will likely arrive as one 5m piece.
Now it’s time to cut it. Grab your tape measure, mark out the midpoint, and cut. You should end up with two equal lengths (within a few mm). Personally, I just grab both ends in one hand, line them up, spread my arms, find the midpoint by feel, kink it slightly, and snip. It’s not exact, but once you’ve done it a few times, it’s quicker and just as accurate.
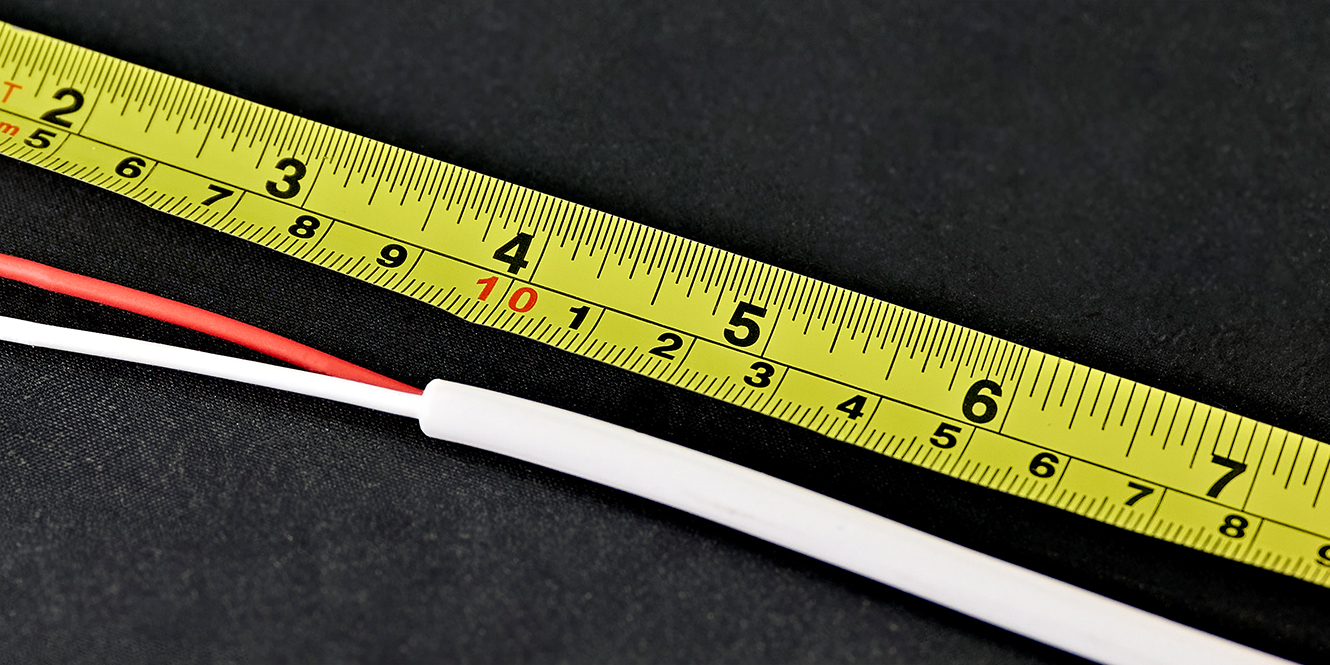
2. Split and strip the cable
Next, you’ll want to split and strip the cable. Find a solid surface to work on – a chopping board or countertop works well.
For a typical “shotgun” style cable like QED 79 Strand, you’d score down the middle between the two barrels and pull them apart. For the Fisual cable, mark around 4–5cm from the end and lightly score around the outer jacket with your knife. Flex and bend the cable gently as you go – once the red and white inner cores become visible, you can wiggle the jacket loose and remove it.
Then take your wire strippers. Using the correct gauge hole (around 5.5mm), strip about 1cm of insulation from the copper cores. Don’t nick the copper strands – slow and steady does the job.
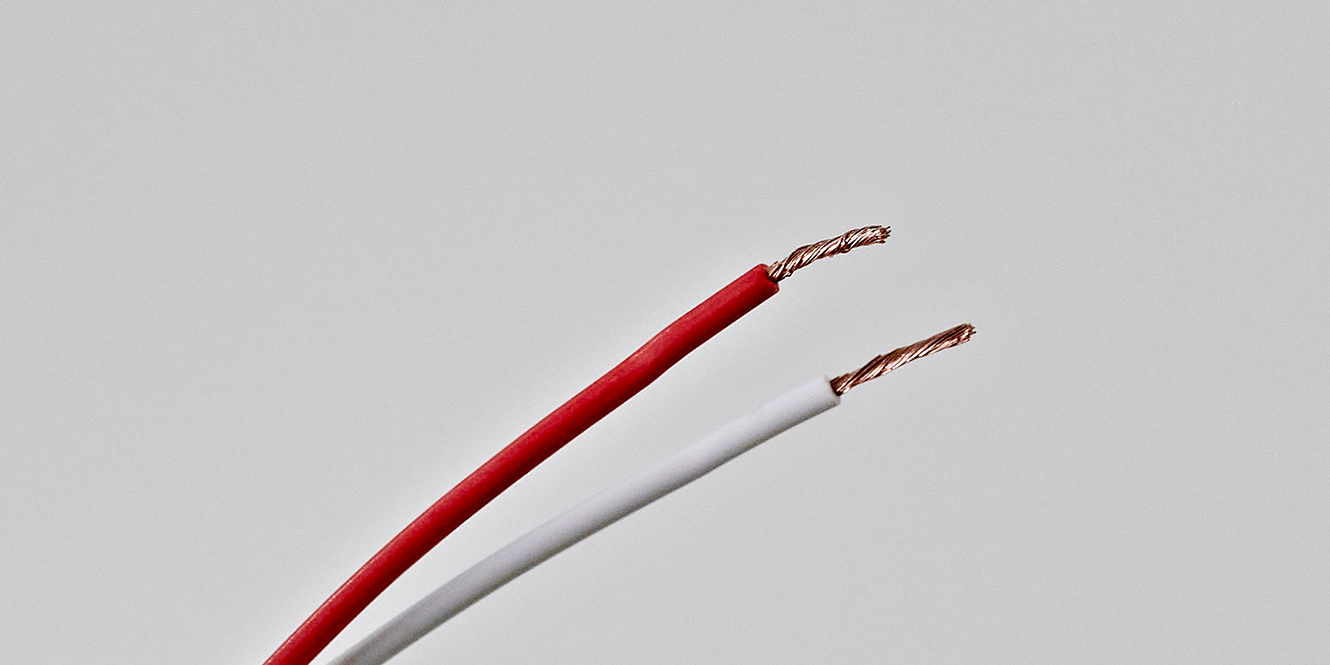
3. Twist the copper strands
Some might call this busywork, but trust me, it makes step four much easier. Take the exposed copper at each end and twist the strands into a neat, compact bundle. This stops stray strands from going astray, reduces the chance of shorts, and makes the cable far easier to insert into plugs or binding posts.
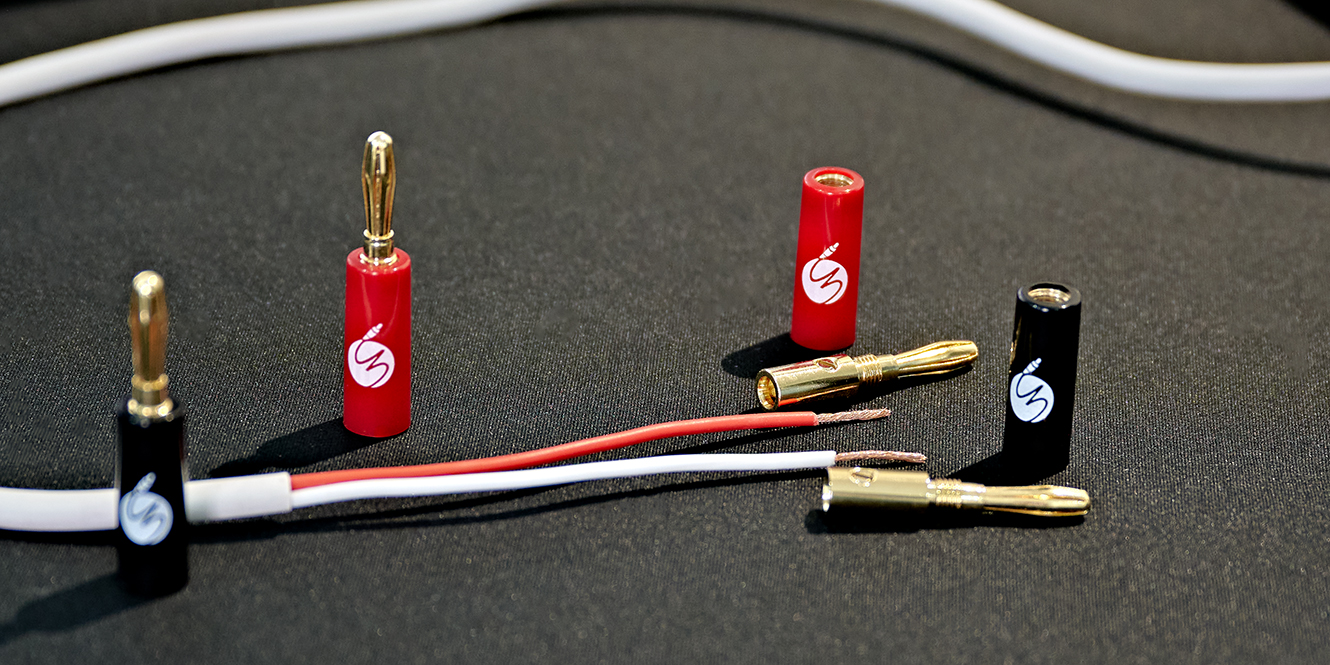
4. Connect the plugs
In this case, we’re using banana plugs – specifically those supplied in the Fisual cable pack. While they don’t improve sound quality, they help protect the cable ends and make setup and future changes much easier.
Over time, exposed copper oxidises – it’s just a fact of life (just look at the Statue of Liberty). Plugs act as a protective housing and help avoid the need to redo your terminations years down the line.
To fit them, unscrew the collars and you’ll find a “C”-shaped channel and a small grub screw. Loosen the screw about 80%, insert the neatly twisted copper end all the way in, and tighten the screw firmly – but don’t overtighten.
Repeat this for all eight ends.
Once that’s done, if your cable is colour-coded – like Fisual – just pop the red collars onto the red ends and you’re done. If you’re using something like Audio-quest Rocket 11, which isn’t colour-coded in the usual way, you’ll need to assign a conductor to positive or negative. Hold one end, trace it to the other, decide which side you want as positive (red/white), and attach the collars accordingly.
If your system doesn’t support plugs, use red electrical tape or heat shrink to mark polarity clearly – it’ll save you confusion when wiring everything up.
5. Actually connect your speaker cable
Now to plug it all in. Connect the red end to the red terminal on your speaker, and the black or white end to the black terminal.
If you’re using banana plugs, you’ll first need to remove the little end caps from the speaker terminals. This can be a bit awkward if you don’t have much in the way of fingernails, but a small screwdriver helps to gently pop them out. Once removed, the banana plugs should slide straight in.
If you’re using binding posts, the process is much the same. Unscrew the post until you can see the side entry hole, insert the bare copper or plug, and tighten the post back down. Spring clips work differently – push the clip down, insert the bare cable, and release to clamp it in place.
Repeat for both ends and both channels on your amp and speakers. Take your time and try to enjoy the process – there’s something satisfying about doing it all properly by hand.

Are high-end cables worth it?
Proportionally, yes, high-end cables are worth it. As with interconnects, a good speaker cable won’t add anything to your sound – it just preserves what your system already delivers. If you have a high-end setup, it makes sense to match it with decent cabling. I went on a fairly in-depth tangent on this in my article about the 11 best CD players and my one about how to connect your CD player to a system.
If you’re just starting out, though, you don’t need to spend £35+ per metre. A basic 79-strand cable is fine for most systems, and the QED Silver Anniversary offers a great mid-tier option.
There’s an old rule of thumb: spend around 10% of your system’s total value on cables and interconnects. It’s not gospel, but it’s a good starting point.
How to connect turntables to speakers
Connecting a turntable to speakers is similar to any external source, but you’ll need an amplifier somewhere in the chain. Turntables don’t produce enough output to drive speakers directly.
First, check the output type – usually RCA, though some use Mini-XLR. You’ll also need a phono stage – either built into your amp, your turntable, or as a separate unit. If you’re using a traditional amp, everything we’ve covered about speaker cables still applies.
If you’re using active speakers with a built-in phono stage like the Triangle AIO Twins, you can connect the turntable directly to the main speaker.
For physical connections, it’s red to red and white to white – nothing more complicated than that. If your turntable uses Mini-XLR, you’ll just need a Mini-XLR to RCA cable instead.
FAQs
Is there a wrong way to wire speakers?
There is a wrong way to wire speakers, and the most common mistake is getting the polarity wrong. If you connect the black terminal on the amp to the red terminal on the speaker, you’ll put the speakers out of phase. If the other speaker is wired correctly, the result is thin, weak sound, as the speakers are essentially fighting each other.
How can I tell if a speaker wire is positive or negative?
A speaker cable itself is not inherently positive or negative; rather, it is the signal running through it that determines this. Most cables include a visual guide to help with identification. For example, QED Silver Anniversary cables have a printed “+” on one side, while others, such as Chord Clearway, use red and white inner jackets for easier distinction. The key is to remain consistent at both ends – that’s what matters most.
What’s the best connector for speaker wire?
Banana plugs are generally the easiest and most practical connectors for speaker wire. They’re simple to use and reduce oxidisation over time. Bare wire works fine too, but requires more maintenance. Spade plugs offer a secure connection and are common in older gear. Ohmic plugs are crimped, which prevents oxidisation almost entirely, but they’re fiddly and not reusable.
Final thoughts
Knowing how to wire speakers is a pretty useful skill to have, and in all honesty, it’s a relatively straightforward job – as long as you plan ahead and have the right tools to hand. Trying to terminate cable without at least a decent knife will turn it into a frustrating task!
Just take your time and try to enjoy the process – there’s something oddly satisfying about getting it right. Measure twice, cut once – and put the red end in the red hole. That’s really all there is to it.
To learn more, check out the following guides:


0 Comments